Ribbon Diancui Tutorial: DIY Faux Kingfisher Feather Inlay Jewelry
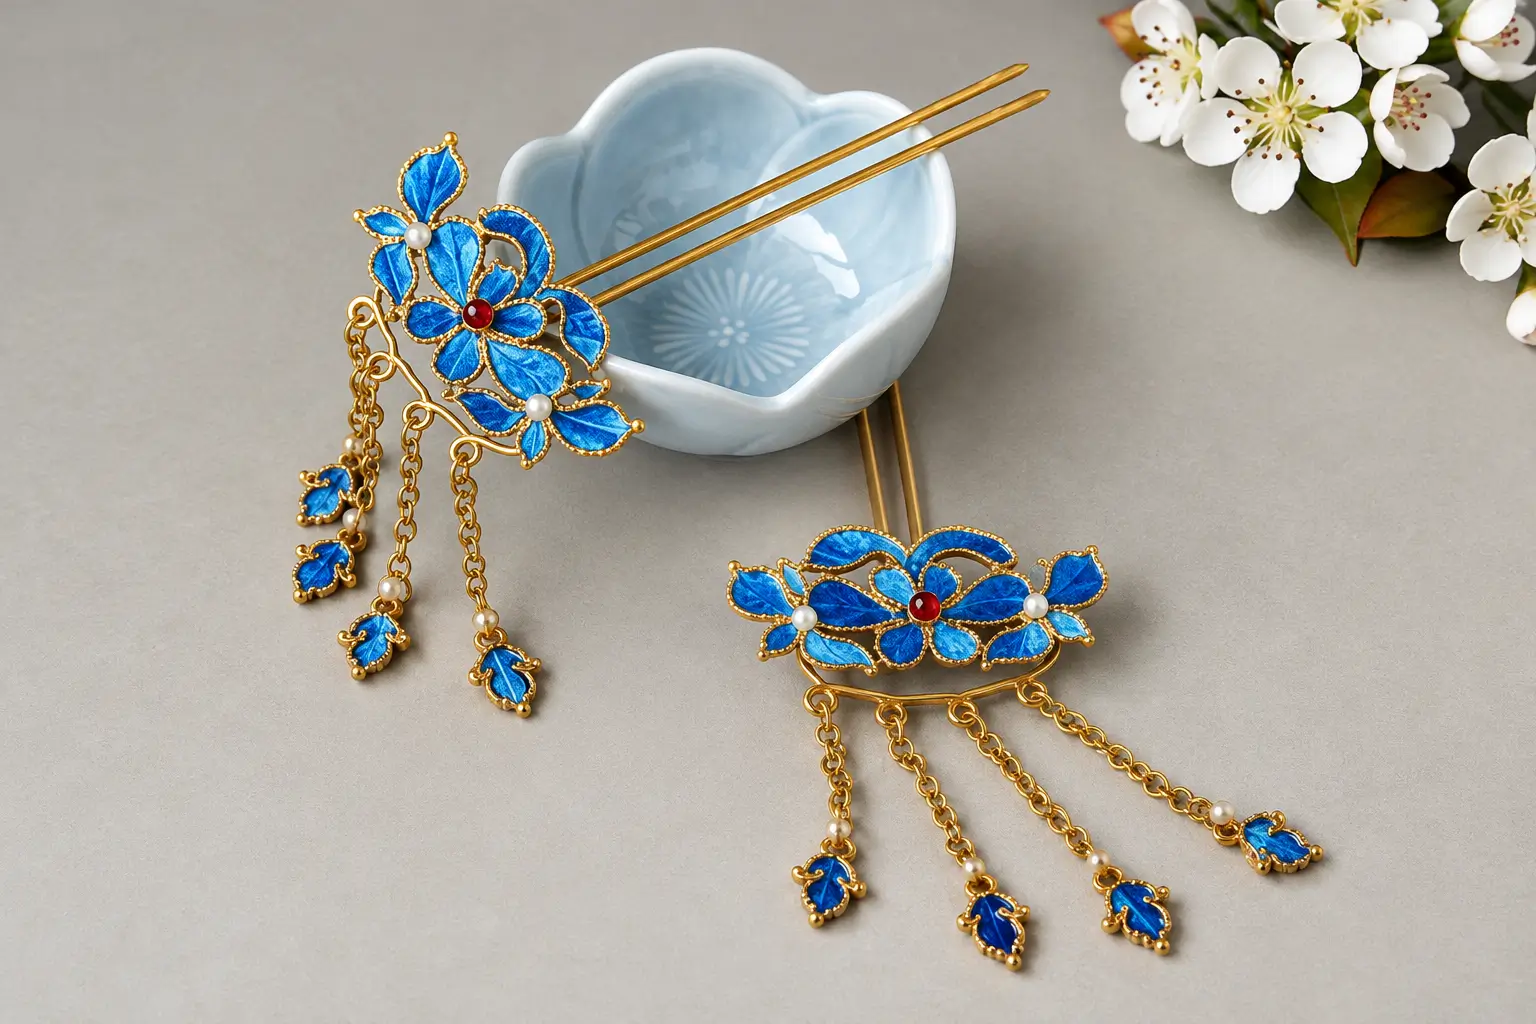
Diancui (kingfisher feather inlay) is a traditional Chinese decorative technique that combines fine metalwork with kingfisher feathers. Techniques such as metal chasing and filigree and inlay create intricate metal settings for the feathers, whose vivid blue sheen gives the finished piece its distinctive look.
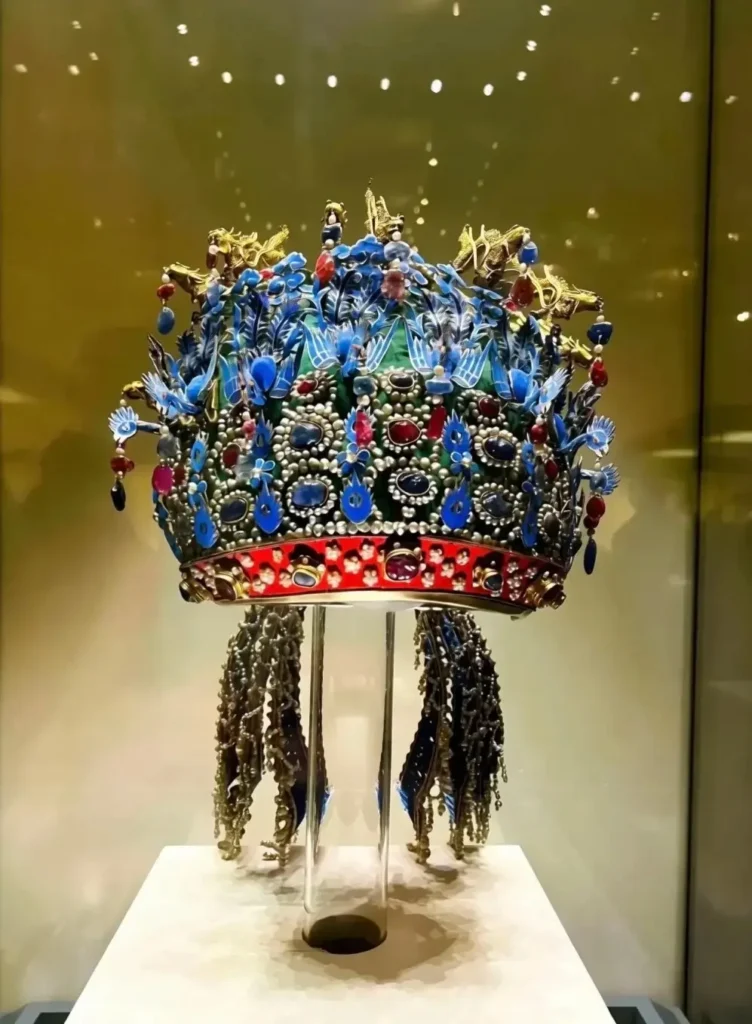
To protect wildlife, modern restoration work often uses dyed goose feathers, peacock feathers, or parrot feathers to achieve a similar color and decorative effect.
In this DIY tutorial, we use blue satin ribbon to imitate the fine texture and sheen of kingfisher feathers, creating a faux Diancui effect.
The tutorial covers two steps: making ribbon strands that resemble kingfisher feathers, then arranging and attaching them to a metal base.
Part 1: Making Faux Kingfisher Feather Strands with Blue Ribbon
Materials
- Blue satin ribbon: Choose a soft ribbon with fine threads and a noticeable sheen.
- Paper: Prepare 2–3 sheets of absorbent paper.
- Flat brush
- Scissors
This tutorial uses blue satin ribbon about 2 cm wide and Xuan paper as the work surface.
Step 1: Cut the Ribbon
Cut the ribbon into pieces about 10 cm long.
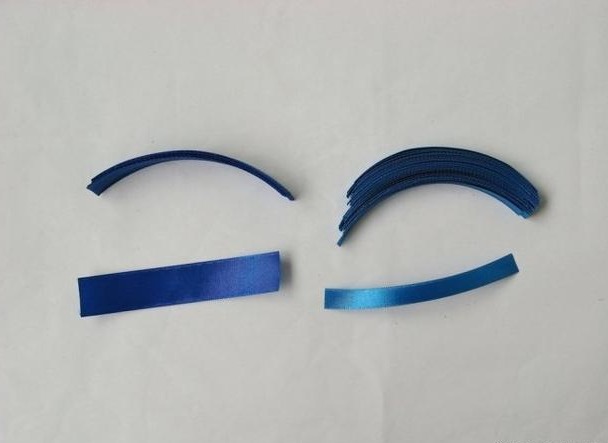
Keep the ends in the same direction as you cut each piece. Ribbon usually unravels more easily in one direction than the other. Keeping the ends consistent will make the next step easier.
Step 2: Pull the Threads
The method varies depending on the ribbon’s width.
Ribbons about 1 cm wide can usually be unraveled directly. For ribbons 2 cm wide or wider, check the edge for a very fine, nylon-like thread that holds the ribbon together. If you find one, remove it before pulling out the other threads.
You can follow the hand movements shown in the photos or adjust your technique to suit your preference. First, find the direction in which the ribbon unravels most easily. Then, pull the threads out slowly in that direction.
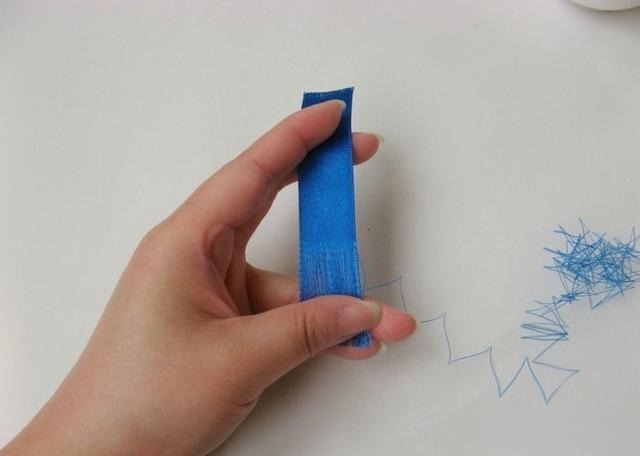
Keep the threads straight and neatly aligned as you work. Avoid letting them cross, tangle, or bunch up.
For each 10 cm piece of ribbon, pull out the threads along about 8 cm of its length, then cut the loose threads. Leave about 2 cm of the ribbon intact at one end. This unfrayed section will make the strands easier to arrange, secure, and coat with starch paste.
Step 3: Apply Starch Paste to the Ribbon Strands
Once you have pulled out the threads, arrange them neatly into strands. Fine threads can easily shift out of place due to static electricity, so handle them gently and avoid unnecessary friction.
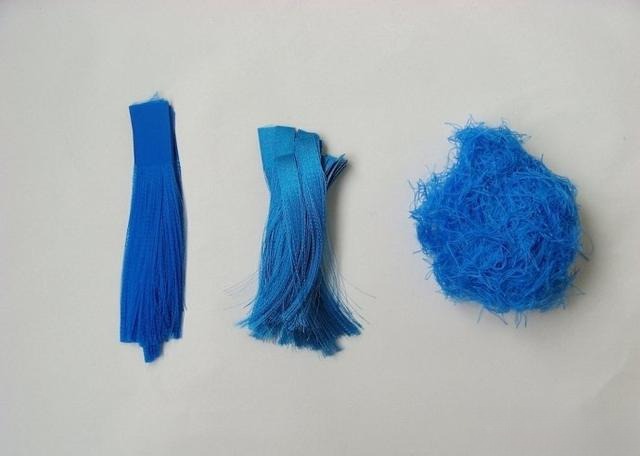
Make the Starch Paste
This tutorial uses wheat flour to make the paste. You can also try sweet potato starch or potato starch.
Add some wheat flour and water to a stainless steel container. Stir until the mixture is smooth and free of obvious lumps. Heat it over low heat, stirring constantly, until it thickens into a smooth, semi-translucent paste. Let it cool before use.
Keep an eye on the heat and the amount of water. Too much heat can scorch the paste, while too little water can make it too thick to apply easily.
Based on practical experience, this tutorial uses plant-based starch paste rather than commercial glue. The treated ribbon strands retain a surface sheen that better suits the desired effect.
Secure the Strands to Xuan Paper
Stack two or three sheets of Xuan paper to create your work surface.
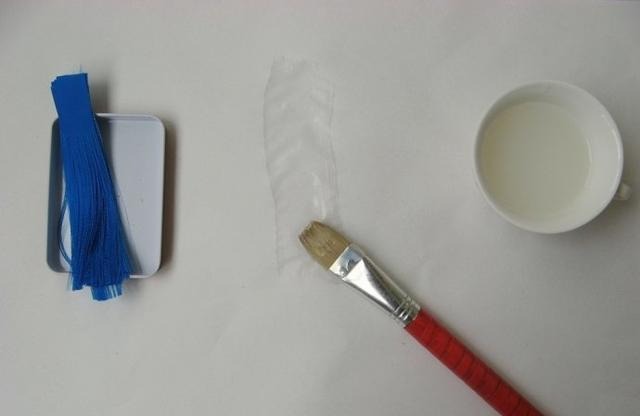
Use a soft, fine-bristled flat brush made with goat hair. Brush a strip of paste onto the top sheet, making it slightly wider than the ribbon strands.
You can use my hand movements as a reference. Hold the top of the strands between your right thumb and index finger. Use your left index and middle fingers to grip the same end, then gently smooth the threads downward in the direction they run. When you reach the bottom, gently pull the strands taut with both hands to keep them straight. Lay them flat against the pasted area of the paper and press them into place.
Keep the strands under gentle tension as you work. Avoid leaving them loose or allowing them to bend. If you cannot lay the entire length flat at once, secure the intact ribbon end first, then gradually press the remaining strands onto the paper, working in the direction of the threads.
Coat the Strands with Paste
Once the strands are in place, apply the paste.
Using the flat brush, spread the paste evenly from top to bottom, following the direction of the threads. Avoid brushing back and forth, as this can disturb their alignment.
Apply three or four coats, or until the paste has thoroughly penetrated the strands. If you notice visible gaps between the threads, use the flat brush to gently nudge them toward each other for a tighter, more even arrangement.
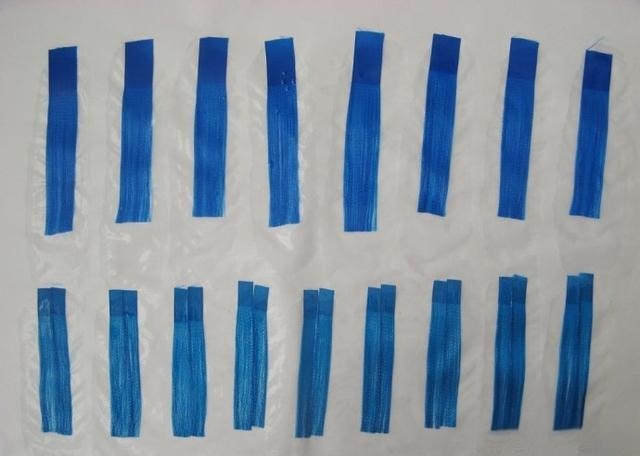
When finished, leave the strands on the Xuan paper and allow the paste to dry partially.
Step 4: Change the Paper and Air-Dry the Strands
When the paste has partially dried but the strands are still slightly damp, gently lift them from the paper, turn them over, and place them on a clean sheet.
Repeat this process of changing the paper, turning the strands over, and air-drying them two or three times, until they are completely dry.
Don’t wait until the strands are completely dry before turning them over for the first time. If the excess wheat-flour paste dries before you turn them, it can leave a thin, film-like coating that makes the strands harder to handle. While the paste is still slightly damp, you can also adjust any gaps between the threads. Change the paper promptly to prevent the strands from sticking and help both sides dry evenly, giving them a more uniform sheen.
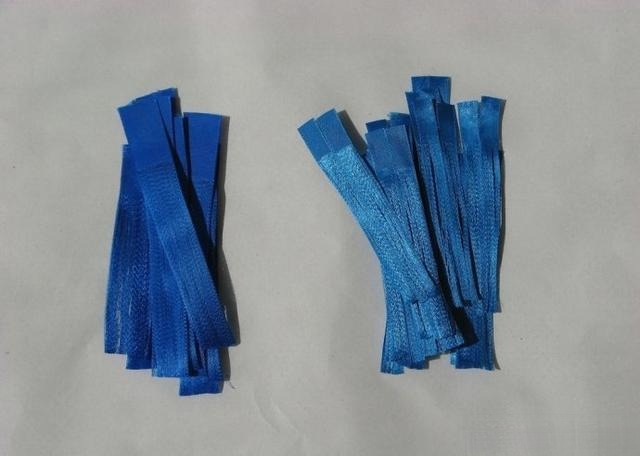
Once dry, the strands should have a fine, even texture, with each thread clearly defined, along with a subtle sheen reminiscent of kingfisher feathers. The faux feather material is now ready. Next, cut the strands into the required shapes and arrange them on the metal base.
Part 2: Arranging the Faux Feather Strands on a Metal Base
Before you begin, prepare the following materials:
- Metal base: I made the metal hairpin base used in this tutorial myself. You can also buy a ready-made base that suits your design.
- Paper: Use Xuan paper or tracing paper to trace the pattern on the metal base.
- Glue stick: Choose one with a low water content to help prevent the paper from wrinkling.
- Pencil: For tracing and refining the pattern.
- Scissors
- Tweezers
- Pinking shears (optional): For trimming the edges of the ribbon strands.
Step 1: Trace the Metal Base Pattern
Place a sheet of thin paper over the metal base. Hold it firmly in place to prevent it from shifting as you trace.
Hold the pencil sideways and gently rub the graphite over the paper. Follow the outlines of the filigree sections on the metal base to capture the full pattern clearly.
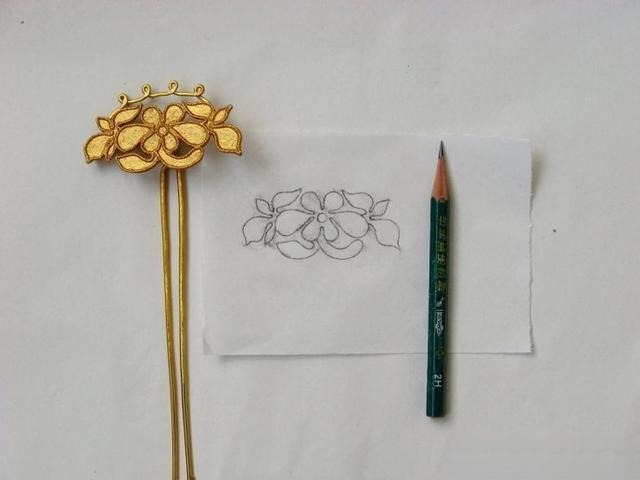
When you finish, compare the tracing with the actual base. If any outlines look unclear, lines are broken, or shapes seem inaccurate, refine the drawing by hand.
Step 2: Draw the Feather Arrangement
Use the traced pattern as a guide. Study how bird feathers overlap and arrange themselves, then plan the direction, angle, and placement of each ribbon strand. Draw a layout showing how the strands will fit together on the metal base.
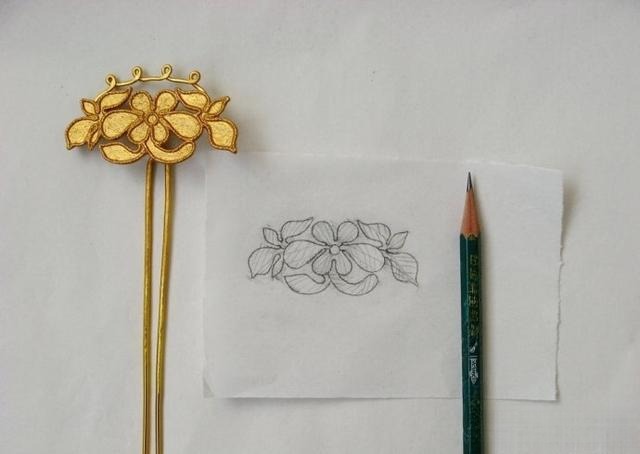
Vary the arrangement across different areas to keep the overall design from looking repetitive.
If you already have a clear visual reference or are familiar with how to arrange the strands, you can skip this step.
Step 3: Make Paper Templates for Each Section
Divide the full traced pattern into smaller sections and draw each one on a separate piece of paper. Each template should match one decorative area on the metal base. These templates will help you shape and arrange the ribbon strands one section at a time.
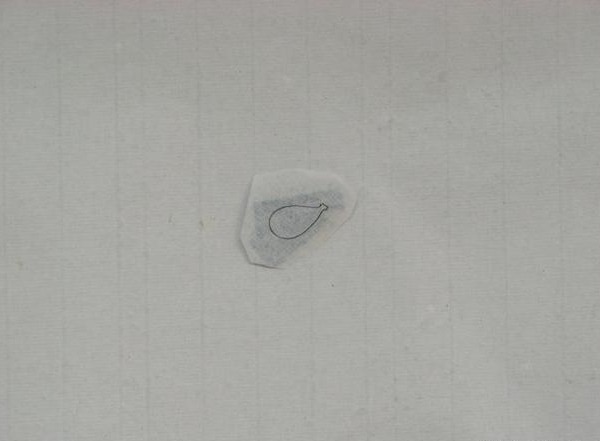
If the paper is thin enough for the outlines on the front to show through clearly, you can cut along the visible lines. If the outlines are difficult to see, draw over them along the edges on the back of each paper piece. This will make the lines easier to follow when cutting and trimming.
Step 4: Arrange and Glue the Ribbon Strands onto the Paper Templates
Use your layout drawing as a guide to determine the direction of the ribbon strands in each section.
Whenever possible, cut and arrange the strands at an angle. Diagonal arrangements create more varied light reflections than simple horizontal or vertical patterns. They also help the finished surface look closer to the natural sheen of bird feathers.
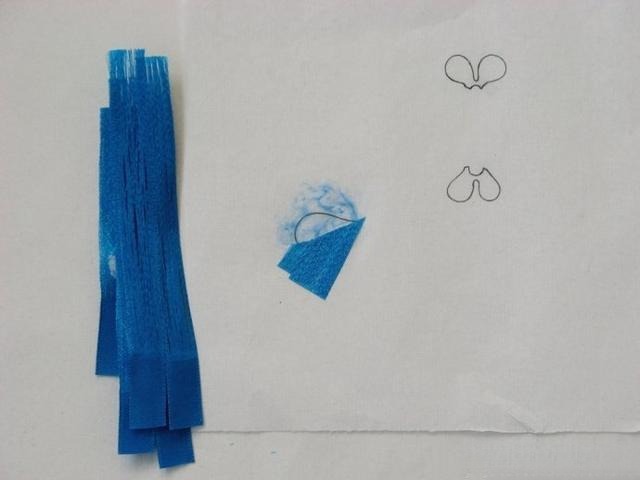
Apply a suitable amount of glue stick adhesive to the paper template. Then place the strands section by section, pressing them gently into the glue and arranging them neatly against the paper.
Before the glue sets, use your fingers or tweezers to adjust the strands. Gently draw any loose threads toward the center to close visible gaps.
If gaps remain, fill them with additional strands. Cut a small piece of ribbon strands to the right width and length, then glue it over the gap at a suitable angle.
Filling gaps takes patience and some hands-on experience. When you get the placement, angle, and coverage right, the extra strands can fill gaps and add depth to the design. If you place them poorly, however, the repaired area may look uneven and stand out from the rest of the surface.
Add Depth with Different Shades and Overlapping Strands
Instead of using only one shade of blue, try combining lighter and darker blues from the same color family. This helps recreate the color variations seen in kingfisher feathers under different lighting conditions.
On larger decorative areas, laying all the strands flat in a single layer can make the surface look plain. Try overlapping strands in sections to create more visual depth.
For example, lay down a base layer first, then add strands in other shades. Adjust the direction and coverage of each layer to create a natural transition between colors.
To soften the edges where different shades meet, you can use pinking shears to create a zigzag edge. Carefully trim and adjust the overlapping strands to make the transition between colors look more natural.
Once you have finished arranging the strands, let the glue dry completely before trimming the edges.
Step 5: Trim the Pattern
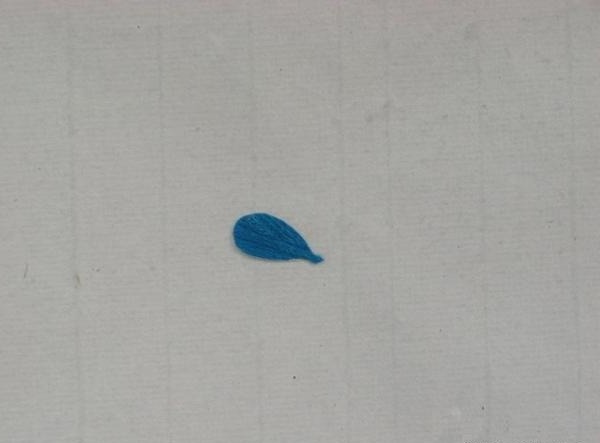
Once the glue has dried completely, carefully cut along the outline on the back of the paper template to trim the assembled ribbon strands to the required shape.
Follow the outline as closely as possible, and avoid cutting away too much material at once. For areas with intricate edges, make a rough cut first, then refine the shape gradually.
When you finish, use tweezers to gently lift the cutout and place it into the matching recess on the metal base. Check that its edges fit the outline.
If the cutout is too large or does not sit flush in certain areas, remove it and trim away a small amount at a time. Repeat this process until the shape matches the recess accurately.
Step 6: Secure the Pattern to the Metal Base
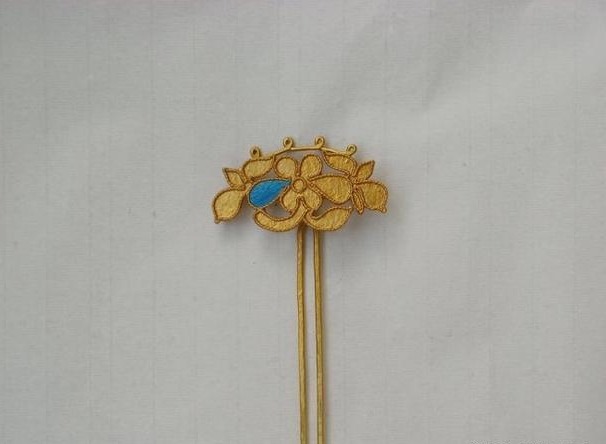
Once the cutout fits the metal base perfectly, apply a suitable amount of glue stick adhesive to the corresponding recess. Carefully place the assembled pattern into the recess.
Cover the surface with a clean, soft cloth and press gently to help the pattern bond firmly to the metal base. Apply even, light pressure to avoid shifting the strands, creating wrinkles, or damaging the surface.
Let the glue dry completely. Then check that the decorative surface lies flat, the edges are secure, and no obvious gaps or areas need further adjustment.
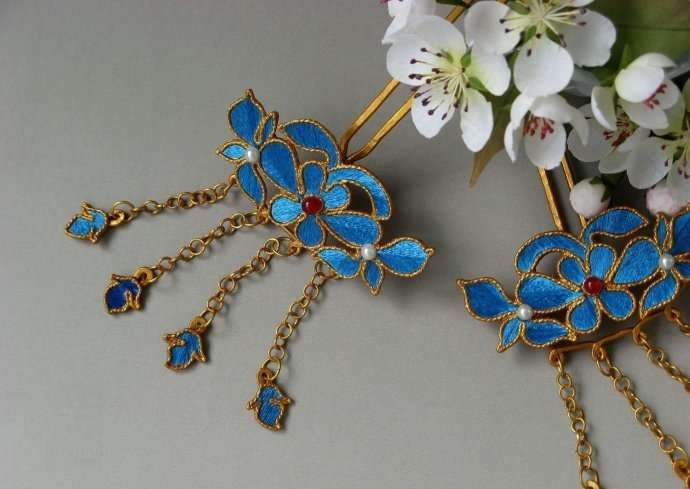
Your faux Diancui piece, made with blue satin ribbon to imitate the look of kingfisher feathers, is now complete.
Jewea’s Perspective
Traditional Chinese Diancui is known for the distinctive color and sheen of kingfisher feathers.
While respecting this traditional craft, we use blue satin ribbon to imitate the texture of the feathers. This is just one approach; other materials and techniques are also worth exploring through hands-on experimentation.
At Jewea, we believe contemporary jewelry design can draw inspiration from traditional art while exploring new ways to work with different materials.
We hope this Ribbon Diancui Tutorial offers useful ideas for readers interested in traditional Chinese jewelry techniques, handmade crafts, and material experimentation.